Thursday, August 28, 2014

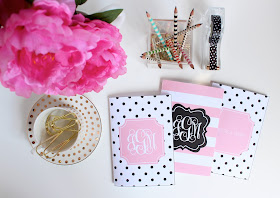
DIY Printable Notebook

Free DIY Printable Notebooks by Jessica Marie Design

I am obsessed with notebooks. 
I couldn't even tell you how many blank (& beautiful) notebooks I have laying around. 
Notebooks are my weakness! 

This isn't the first time I create DIY notebooks, remember this? Well in the spirt of making old things new, or in this case making old blog posts new again, I've create new DIY printable (& Customizable) notebooks!

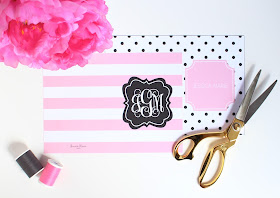
The DIY Printable Notebook file (download link in the instructions section) comes with two patterns and two customization options! The notebooks come in black & white polka dots and pink stripes. You have the option of customizing with your monogram or with regular text! 
 Free DIY Printable Notebooks by Jessica Marie Design
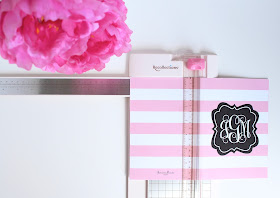
Print on white card stock & trim the notebook covers

Free DIY Printable Notebooks by Jessica Marie Design
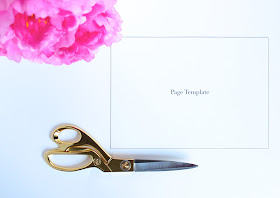
Use the Page Template to trim the inside pages for your notebook
Free DIY Printable Notebooks by Jessica Marie Design
Use a scoring board to score the center of your notebook. 
Free DIY Printable Notebooks by Jessica Marie Design
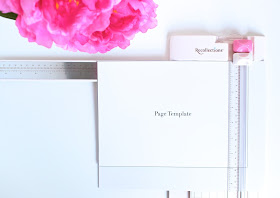
Align the Page Template with the paper and trim.
Free DIY Printable Notebooks by Jessica Marie Design
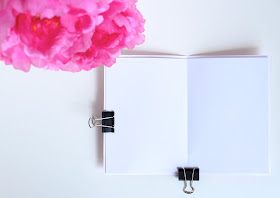
Use Binder Clips to keep the pages together before you sew.


DIY Printable Notebooks

Materials:
Instructions:
  1. Download the DIY Printable Notebook PDF
  2. Open the file in Adobe Reader. Adobe Reader is free. Opening the file in other programs may show a different font.
  3. Edit the monogram in the following format: First name initial: lowercase, Last name initial: uppercase, Middle Name initial: lowercase
  4. Edit the text pages. Customize with your name or notebook title.
  5. Save the file.
  6. Print! For the best results do NOT scale the page. Borderless printing will provide you with the correct notebook size. Search Google for "Borderless printing with "printer name here" printer" for instructions. Note that some printers do not have borderless printing, in that case I recommend printing a test page to see how it works. I also recommend printing on white card stock. If you have access to laminating that would be great! I'm not sure how stitching works on laminated paper but it is worth a try!
  7. Trim the DIY printable notebook cover & page template.
  8. Use a scoring board to score the center of your notebook. Or simply fold it down the middle :)
  9. Use the Page Template to trim the inside pages for your notebook. You can use a scoring board/trimming board to make this easier. I used 6 sheets of paper for my notebook, this was all my sewing machine could handle! 
  10. Use Binder Clips to keep the pages together before you sew. Not sewing your notebook together? Use a stapler to attach your pages together.
  11. Enjoy your new custom notebooks! 
Free DIY Printable Notebooks by Jessica Marie Design
Pretty DIY Notebooks!  Sources: Pencils  |  Pencil Cup |  Tape Dispenser 

Enjoy your new DIY notebooks! 

<3__Jessica

Friday, August 15, 2014

Printable Dividers for your Mini Binder

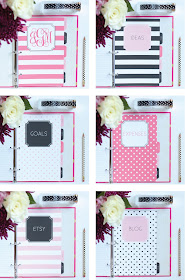
Custom Printable Dividers for Mini Binders by Jessica Marie Design

It's time for a fun printable DIY! Last year I created a set of Pink & Navy Printable Dividers for your Mini Binders 
and I thought it would be fun to bring them back! Just in time for back-to-school!  

The new set of printable dividers features dots and stripes in Pink & Black. 
The PDF is editable so that you can customize the titles to what you need!

Custom Printable Dividers for Mini Binders by Jessica Marie Design
Print on White Card Stock & Trim
Custom Printable Dividers for Mini Binders by Jessica Marie Design
Pretty trimmed dividers!

Custom Printable Dividers for Mini Binders by Jessica Marie Design
Use a sheet of paper to align your hole punch.

DIY Printable Dividers for your Mini Binders

Materials:


Instructions:

  1. Download the Printable Dividers PDF
  2. Open the file in Adobe Reader. Download Adobe Reader here. Opening the file in other programs may result in you seeing a different font.
  3. Edit the monogram in the following format: First name initial: lowercase, Last name initial: uppercase, Middle name initial: lowercase
  4. Edit the tab text and cover text to titles that work for you! 
  5. Save the file.
  6. Print! For the best results do NOT scale the page. Borderless printing will provide you with the proper size divider. Search Google for "Borderless printing with "printer name here" printer" for instructions. Note that some printers do not have borderless printing, in that case I recommend printing a test page to see how it works. I also recommend using white card stock. 
  7. Trim each divider.
  8. Use a sheet of paper to align your hole punch for each divider.
  9. Place the dividers in your mini binder and have fun getting organized! 


Customize the Monogram and Titles!  Printable Dividers for Mini Binders by Jessica Marie Design


More Printable Divider Designs available at ThePreppyGreek.etsy.com
 

<3__Jessica


Friday, August 1, 2014

Dress Your Tech: Dream Bigger


Happy August! Can you believe that summer is winding down and fall is just around the corner? 
There is still so much on my summer to-do list to get done before the fall.

Let's all make this a month that we Dream Bigger and accomplish our goals! 


Download for your screen size and enjoy! 
Don't know your screen size? Click Here and it will tell you what it is :)


<3__Jessica